How to create a Composer Patch to fix any Magento issues quickly
Use Composer Patches to easily fix issues in third-party code without needing to make a module.
:quality(80))
We’ve all seen it; you find an error in someone else’s code. You’ve alerted the vendor, they promise a fix soon, but you need to fix the issue now. What do you do?
There are two ways of changing third-party code:
Create a module which extends the existing module. This is great for long-term changes, such as functionality changes
Create a patch to the existing module. This allows us to change the existing code in any way you need. This is perfect for one-line fixes for things like typos, or urgent stop-gap fixes.
Today we’re going to talk about patching modules using Composer Patches.
Step 1: Create a folder to store your patches
Patches should be seen as temporary files that you want to get rid of as soon as possible. Ideally, the vendor will release the fix in a future version and you can then remove the patch. Carefully categorising your patches into folders really helps ease this process.
We like to create a patches folder in the root of the project, then have a folder for each vendor, and within this a folder for each module. This would give you a structure like this:
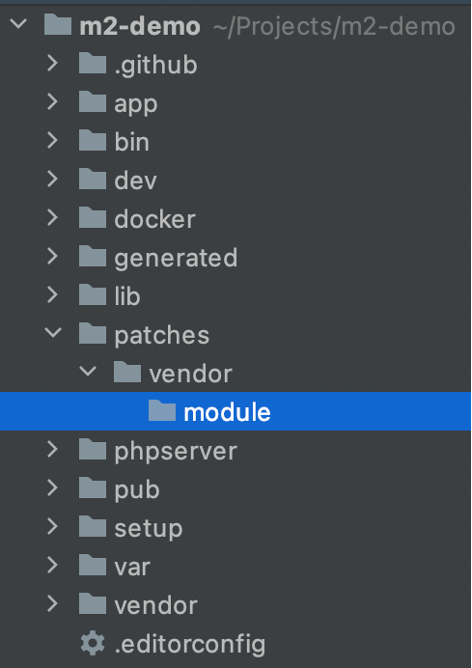 Folder structure for Composer Patches
Step 2: Track Vendor Changes
Before you can create a patch you need to create a checkpoint of the current version. This allows you to produce a list of all the changes (a 'diff') later on for our patch.
Go into the module folder, init a Git repository, add all existing files and do a dummy commit. This gives us a starting point, before your changes.
You now have a local repository, any changes you make now will be tracked.
Step 3: Make all required changes
Make your change in the vendor’s module as required. Remember to keep them simple, if you're doing lots of changes it's normally best to make your own module instead.
Step 4: Create the patch
Now you've made the change you can get details of all your changes (the 'diff') using Git. Store the output of this into a patch file which we'll tell Git about next.
git diff > ../../../patches/vendor/namespace/module/patch-name.patch
This creates a new patch file in our newly create patch folder. Replace patch-name with a clear descriptive name of what your patch is for.
Example Patch
MageWorx have an excellent Giftcard module which allows customers to purchase gift cards for friends and family and have them automatically emailed to their recipient on a set date.
Our client had an issue where in some cases the email was never sent. This caused a customer-service nightmare, we needed to get this sorted promptly.
We tracked down the fault to the way the module got the list of vouchers to send on a Cron. The data was limited to only logged in customer gift cards, meaning that guest orders would never be automatically sent.
By updating one line to use a less-restrictive function we were able to get vouchers sending again while we waited for MageWorx to implement our fix in their module.
 Example of a patch file applied to fix a serious gift card issue
Step 5: Apply the fix automatically in Composer
The final step is telling Composer to automatically apply your patch when installing the module.
Composer doesn’t do this by default, and instead needs an extension to be added. There’s a couple of different options to pick from, but the de facto within the community is the excellent cweagans composer patches. To install this run:
composer require cweagans/composer-patches
The final step is to connect the third-party module with our patch.
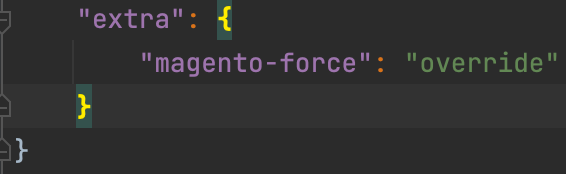
Within your composer.json file look for a section called ‘extra’. It should look something like this:
 Extra section in composer.json
If the section isn’t already in your composer.json then add it in.
Within the ‘extra’ section add a new “patches” section. Within that the syntax is simply the name of the module you wish to patch, followed by your patch, like this:
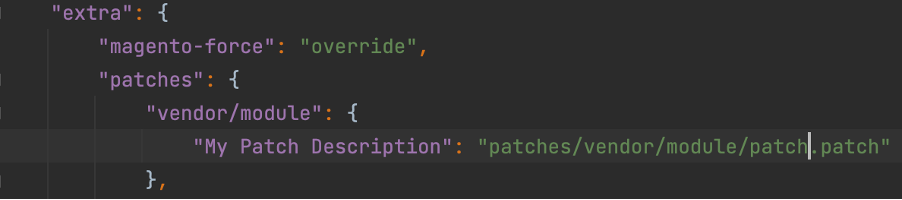 Adding the list of patches to composer.json
Here we are applying a patch from patches/vendor/module/patch.patch to the vendor/module.
Step 6: Trigger the update in your composer.lock
The changes in step 5 are sufficient to apply our patch, but as you have changed composer.json directly a warning will be shown on each run as the composer.json file is out of sync with composer.lock.
Run the following to sync the files up:
composer update --lock
Step 7: Revert your changes, and test Composer applies the patch
The final check is to make sure this all works.
Go back into the vendors module and revert your changes
Run composer install
Confirm your change is now applied
That’s it! You’ve now created a patch which will automatically apply whenever the module is installed. Remember to remove the patch once the fix is applied to the vendor’s code in the future.